
firebug Reloaded Blogger Template
Firebug reloaded theme is for those who like Dark Backgrounds.
Main features of FireBug Reloaded :
* Adsense Ad 468 x 60 on header right side.
- To suit the header background , please apply these settings in adsense ad set-up.

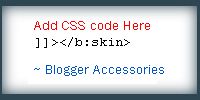
Adsense Ad customization to suit Firebug Blogger template
If you want to use search form instead of Adsense Ad then Please Insert this Code in the HTML widget.
< <div id=”topsearch”>
<form id=”searchForm” action=”/search” method=”get”>
<input id=”s” class=”swap_value” value=”Enter your keywords here” name=”q” type=”text”>
<input id=”go” alt=”Search” src=”http://i286.photobucket.com/albums/ll96/themelib/firebug/go.gif” title=”Search” type=”image”>
</form>
</div>
<div class=”clear”>
</div>
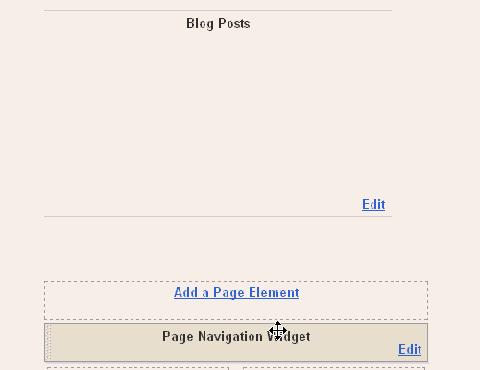
* Page Navigation Menu Hack with some Bugs fixed.

Page Navigation hack for Firebug theme
* Top navigation Menu with Date calender on Right side.
* Subscription Form on Sidebar.
- To have subscription form on sidebar , please insert this code in a HTML/JAVASCRIPT widget.
<a href=”http://feeds.feedburner.com/TechnoWizard” class=”rss” rel=”alternate” type=”application/rss+xml”>Subscribe via RSS</a> | <a href=”http://feeds.feedburner.com/TechnoWizard“>Comments (RSS)</a>
<br/><br/>
<form action=”http://www.feedburner.com/fb/a/emailverify” target=”popupwindow” method=”post” onsubmit=”window.open(‘http://www.feedburner.com’, ‘popupwindow’, ’scrollbars=yes,width=550,height=520′);return true”>Or, subscribe via email: <input class=”subscribetext” name=”email” type=”text”/><input value=”http://feeds.feedburner.com/~e?ffid=1488667” name=”url” type=”hidden”/><input value=”Blogger Accessories” name=”title” type=”hidden”/><input value=”en_US” name=”loc” type=”hidden”/> <input value=”Subscribe” class=”subscribebutton” type=”submit”/></form>
Please replace the text in RED with your own links and code.
* Related posts Widget is Installed.
* Social Bookmarking Widget is also included.
- I have included Post submission links only for Top 10 Bookmarking sites. If you want to include more sites , ask in Comment form I will send the code for remaining sites also.
* Comments with Mybloglog feature enabled. I will write a post soon on this hack.
* Three 125 x 125 Ads section on sidebar.
- To enable this feature , please copy and paste the code.
<a href=”#Advertise” class=”ads”><img border=”0″ alt=”Ad” src=”http://i263.photobucket.com/albums/ii150/mohamedrias/ad.gif”/></a>
I hope you will encourage me to create more templates like these.If you guys need any Blogger Hack or modification , please tell me in comment form . I can even modify template to your wish for free.

 2. Author Comments in different style hack is included. 3. Page navigation Hack.
 4. Two sidebars on right side. ( 180px and 280px ) 5. Best adsense Placement options for higher CTR.


To include the comment Form please Login to draft.blogger.com and go to settings tab and then navigate to comments subtab. there put a check on ” Embed comment form below Post “. That’s it.
read more here ” Embed Comment Form Below Post “.